
The donut bun is a classic hairstyle that has been popular for decades. It’s a stylish and elegant look that’s perfect for any occasion, whether it’s a wedding, prom, or just a day at the office. While it may seem complicated to create, the truth is that it’s actually quite simple, and can be done by anyone with just a little bit of practice. In this blog post, we will provide you with a step-by-step guide on How To Do a Perfect Donut Bun.
To make a donut bun, you’ll need the following items
- A donut bun maker: This is a foam or mesh donut-shaped accessory that helps to create the perfect bun shape.
- A hairbrush: You’ll need a hairbrush to smooth down any flyaways and to distribute your hair evenly around the donut bun maker.
- Hair elastics: You’ll need at least two hair elastics to secure your hair in place and create the bun.
- Bobby pins: You may need several bobby pins to secure any loose hairs or flyaways that are sticking out of the bun.
- Hairspray: You may want to use a little bit of hairspray to keep the bun in place and to smooth down any flyaways.
Once you have all of these items, you’re ready to start creating your perfect donut bun!
Step By Step Guide For How To Do a Perfect Donut Bun
Step 1: Brush Your Hair Thoroughly

Before you start creating the donut bun, it’s important to brush your hair thoroughly to remove any tangles or knots. This will ensure that your hair is smooth and free from any bumps or lumps that may detract from the final look.
Step 2: Tie Your Hair Into a High Ponytail

Next, gather all your hair on the top of your head and tie it into a high ponytail using a hairband. The ponytail should be positioned at the center of your head, and should be smooth and free from any bumps or lumps.
Suggested For You: 20 Best Bob Hairstyles for Women with Images
Step 3: Use a Donut Bun Maker
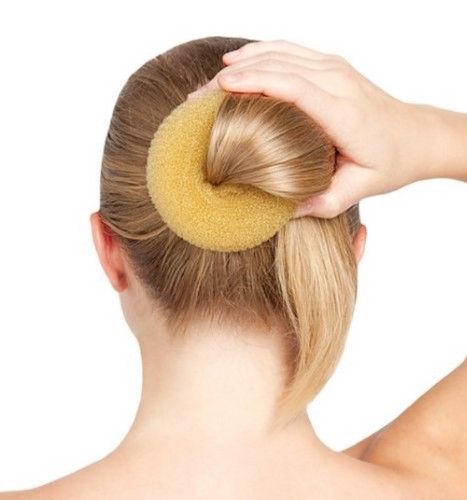
Take a donut bun maker and slide it onto your ponytail. The donut bun maker should be placed at the base of your ponytail, and should be positioned vertically.
Step 4: Spread Your Hair Evenly Around The Donut Bun Maker

Once the donut bun maker is in place, spread your hair evenly around it, covering it completely. Use a hairbrush to make sure that your hair is smooth and free from any bumps or lumps.
Step 5: Cover The Donut Bun Maker With Another Hairband

Once your hair is evenly distributed around the donut bun maker, take another hairband and place it over the donut bun maker. This will secure your hair in place and create the perfect bun shape.
Step 6: Use Bobby Pins To Secure Any Loose Hairs
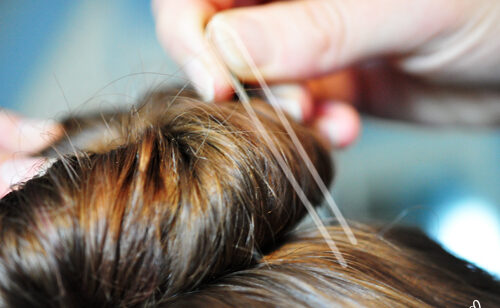
Next, use bobby pins to secure any loose hairs or flyaways that may be sticking out of the bun. Tuck in any remaining hair underneath the bun for a clean and polished look.
Also Read: Homemade Hair Masks for Dry or Damaged Hair
Step 7: Apply Hairspray
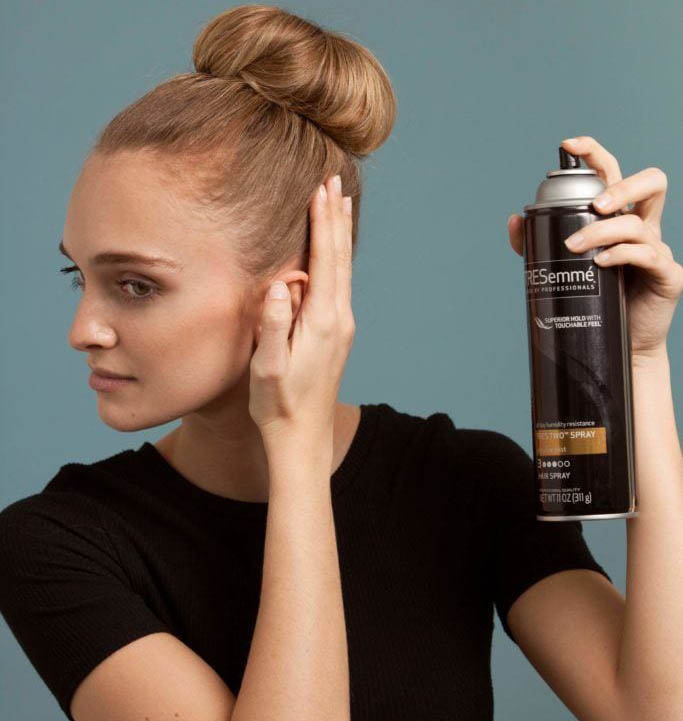
Apply a little bit of hairspray to keep the bun in place and to smooth down any flyaways.
Step 8: Add Accessories (optional)
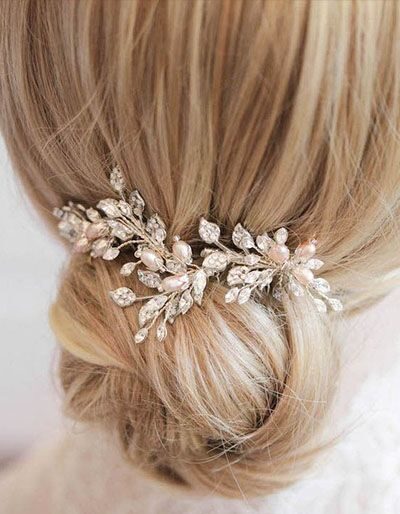
Finally, to enhance the look of your donut bun, consider adding some accessories. You can use decorative hairpins, flowers, or ribbons to give your bun a touch of personal style or match it to your outfit.
Tips for Creating the Perfect Donut Bun
While the above steps may seem easy enough, there are a few tips and tricks that you can follow to create the perfect donut bun:
- Make sure that your hair is completely dry before you start creating the bun. Wet hair can be more difficult to work with, and may not hold the shape of the bun properly.
- Use a donut bun maker that matches the color of your hair. This will ensure that the bun looks natural and blends in seamlessly with your hair.
- If you have shorter hair, you can still create a donut bun by using a smaller donut bun maker. Alternatively, you can create a half-up half-down bun by only pulling the top half of your hair into a ponytail.
- To add some extra volume to your bun, tease your hair slightly before you start creating the bun. This will give the bun a fuller appearance and make it look more dramatic.
- If you’re having trouble getting your bun to stay in place, try using a few extra bobby pins. You can also use a little bit of hair gel to help keep your hair in place.
Conclusion
Creating the perfect donut bun can be done by anyone, regardless of their hair length or texture. By following the above steps and tips, you can achieve a sleek and elegant look that’s perfect for any occasion. So go ahead and try it out for yourself, and see just how easy it is to do the perfect donut bun.
Suggested Links: