
Leg mehndi, also known as henna, is a fun and temporary way to decorate your legs. It involves using a special paste made from henna powder to draw beautiful designs on your skin. The paste is applied using a cone or applicator, and it dries to leave behind a reddish-brown stain. The leg mehndi designs can include flowers, leaves, and other pretty patterns. It’s a popular activity for special occasions or just for fun. The henna stain gradually fades away over time, so it’s not permanent.
Leg Mehndi Design Step by Step for Beginners
Step 1: Prepare the Henna Paste
To begin, you’ll need to mix henna powder with water or lemon juice in a bowl. Gradually add the liquid to the powder while stirring continuously until you achieve a smooth, thick paste. Make sure there are no lumps in the mixture. Allow the paste to sit for a few hours, preferably overnight, to allow the dye to release and the paste to darken.
Step 2: Clean and Exfoliate the Legs
Before applying the leg mehndi design, it’s important to clean your legs thoroughly with soap and water. This will remove any dirt, oils, or lotions that could interfere with the henna’s ability to stain the skin. After cleaning, gently exfoliate your legs to create a smooth surface for the mehndi design. You can use a scrub or a loofah to do this.
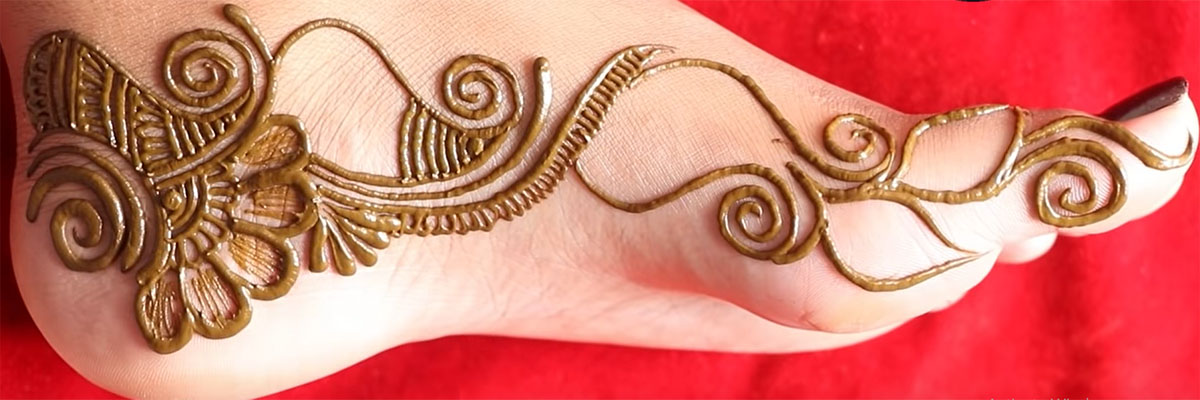
Step 3: Start with a Flower

Using a henna cone or applicator, begin by drawing a small flower in the center of your ankle. Start with a small dot in the center of the flower and then add petals around it. You can make the petals curved or pointed, depending on your preference. The number of petals can vary, but it’s common to have five or six petals for each flower.
Suggested Article: 15 Beautiful and Trendy Raksha Bandhan Mehndi Designs for 2023
Step 4: Add Petals

Extend lines from the flower to create petals. Each petal should radiate outwards from the center of the flower. You can make the petals curved, pointed, or a combination of both. To create simple leg Mehndi design, add as many petals as you desire, ensuring they are evenly spaced around the flower. This will give the flower a fuller and more balanced appearance.
Step 5: Create More Flowers
Repeat steps 3 and 4 to create additional flowers along your leg. You can space them out evenly or cluster them together, depending on the desired look. Vary the size and shape of the flowers to add visual interest to your design. You can make some flowers larger and others smaller to create stylish leg mehndi design.
Also Read: 15+ Beautiful Full Hand Mehndi Designs for Brides
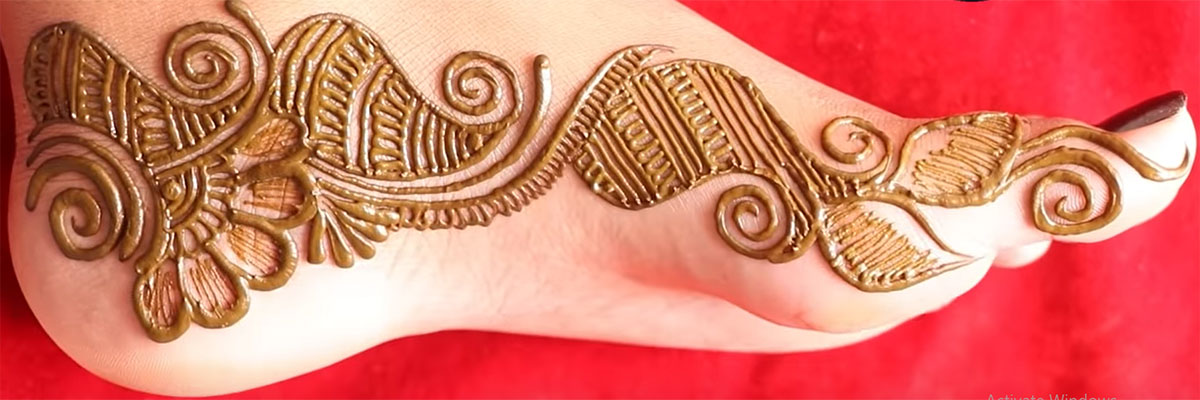
Step 6: Add Leaves
To enhance the leg mehndi design, draw leaves around the flowers. Start by drawing a central vein for each leaf. Then, add smaller veins branching out from the central vein to create a leaf-like pattern. The leaves can be simple or intricate, depending on your skill level and design preference. You can vary the size and shape of the leaves to add variety to your design.
Step 7: Fill in the Gaps
To fill any empty spaces between the flowers and leaves, you can add small dots, swirls, or simple patterns. This will help add depth and fill out the design, making it more visually appealing. You can create patterns like dots, lines, or small geometric shapes to fill the gaps and create a cohesive overall look.
Step 8: Let the Mehndi Dry
Once you have completed this easy leg mehndi design, allow the mehndi paste to dry completely on your legs. It’s important to keep your legs elevated and avoid touching or smudging the design during this time. The drying process usually takes a few hours, but it’s best to leave it on for as long as possible to ensure a darker and longer-lasting stain.
Step 9: Scrape off the Dried Paste
Once the mehndi paste is completely dry, gently scrape it off using a blunt object or your fingers. Start from one end and work your way towards the other, removing the dried paste and revealing the stained design underneath. Be careful not to scratch or irritate your skin while doing this.
Step 10: Apply a Sealant
To enhance the color and longevity of the leg mehndi design, you can apply a sealant. One common sealant is a mixture of lemon juice and sugar. Simply mix equal parts lemon juice and sugar until the sugar dissolves. Then, apply the sealant over the design using a cotton ball or a brush. This will help the henna stain last longer and develop a deeper color.
Remember, practice is key to improving your skills in drawing floral leg mehndi designs. Start with simple designs and gradually progress to more intricate ones as you gain confidence and experience. Experiment with different flower shapes, petal styles, and leaf patterns to create your unique floral leg mehndi designs.